Okay maybe this isn't the most traditional summer meal but then again we haven't been experiencing the hottest summer either... In the freezer I had some beef shanks that were part of the Holy Spirit offering we had received from our local church a couple of weeks ago. It's quite the tradition for Azorean portuguese families. I found this great recipe for Osso Buco from Giada, made a few changes to it by using the beef shanks instead of the veal shanks indicated in the recipe and I was extremely impressed with how it turned out... I think you'll like it too!
Helena’s Take on Osso Buco
Ingredients:
1 sprig fresh rosemary
1 sprig fresh thyme
1 dry bay leaf
2 whole beef shanks (about 1-2 pound per shank)
1 lb of stewing beef, cubed
Sea salt and freshly ground black pepper
1/4 cup butter
1 onion soup mix
4 carrots, sliced
3-4 stalk celery, sliced
2-3 cloves of garlic
1 tablespoon tomato paste
1 tablespoon hot pepper paste
½ cup dry white wine
½ cup water
2 cups chicken stock
3 tablespoons fresh flat-leaf Italian parsley, chopped
1 tablespoon lemon zest
1 raw garlic clove, thinly grated
Directions
For the beef shanks, pat dry with paper towels to remove any excess moisture. Season each shank with salt and freshly ground pepper.
In a large Dutch oven pot, heat butter until melted. Add bee shanks and stewing beef to the hot pan and brown all sides, about 3 minutes per side. Remove browned shanks and reserve.
In the same pot, add the onion soup mix, carrots and celery. The salt in the soup mix will help draw out the moisture from the vegetables. Saute until soft. Add the tomato paste and mix well. Return browned shanks and stewing beef to the pan and add the white wine, water, hot pepper paste and garlic, reduce liquid by half, about 5 minutes. Add rosemary, thyme, bay leaf and 2 cups of the chicken stock and bring to a boil.
Lay beef shanks and stewing beef at the bottom of the crockpot, pouring out all liquids, spices and juices from your pot. Set crockpot to high (4 hours) to ensure meat is tender and falls off the fork.
Once done, carefully remove the cooked shanks from the pot and place in decorative serving platter. Remove bay leaf, rosemary twig and oregano twig before serving. Pour all the juices and sauce from the pot over the shanks.
Garnish with traditional gremolada of: chopped parsley, lemon zest and grated raw garlic and serve with a saffron rissotto.
Enjoy!
Wednesday, July 22, 2009
Friday, July 17, 2009
Starving... What's to Eat?
Okay so I'm still going through that stretch where I refuse to buy any more groceries until we've used what we have in our cupboards and our fridge... The only problem with that is I tend to pig out on the quick and easy to find snacks in the cupboards because by the time I'm scouting about, I'm way past the hungry point...actually more like starving!!
But I was determined to set a good example for my little one. So after having spent the morning cutting out all the recipes in magazines I had collected over the last couple of months, I came across this cookingwithphilly recipe. Although for the last little while I have really deterred from making pasta (for no particular reason to be honest), I had all of the ingredients on hand and with an approximate time of 20 minutes until it was ready, I just had to do it...
Wow, was I glad I did it. This is a great alternative to an alfredo pasta recipe, although it is still quite creamy without being overwhelming. I had leftover chicken breast on hand and threw it in for the last couple of minutes to create our main dish although this would be a great side dish if you don't have any chicken. Once done, I split the pasta among bowls and containers so that lunch was done for the next day and to ensure we didn't eat the whole thing ;)
Even the 2-year old enjoyed this recipe too...
Easy Creamy PHILLY Spaghettini
Prep 5 minute(s)
Ready in 20 minute(s)
Serves: 4 1-1/2 cups (375 mL) each
Ingredients
300 g (1/3 of 900-g pkg.) spaghettini pasta, uncooked
1-1/4 cups 25%-less-sodium chicken broth
1 Tbsp flour
1/3 cup PHILADELPHIA Light Cream Cheese Spread ( I only had the brick and it worked out great too!)
3 Tbsp KRAFT 100% Light Parmesan Grated Cheese, divided
1/4 tsp ground nutmeg
1 leftover chicken breast, thinly sliced
2 Tbsp chopped fresh parsley
Directions
Cook pasta as directed on package.
Meanwhile, beat broth and flour in medium saucepan with whisk until well blended. Add cream cheese spread, 2 Tbsp. Parmesan, nutmeg and leftover chicken; cook 2 min. or until mixture comes to boil and thickens, stirring constantly.
Drain pasta; toss with sauce in large bowl. Sprinkle with remaining Parmesan and parsley.
Enjoy!
Wednesday, May 27, 2009
Tiramisu Tarts
Anyone who knows me, knows I'm a sucker for desserts, more so if they are small and in individual serving sizes... Anything to get away from the guilt ;) When I came across this fun recipe on the Tre Stelle website, I tweaked it a little for what I had in the cupboards that day and brought it with me to a family party during the long weekend. Everyone seemed to enjoy it and it was very easy to put together that morning.
Tiramisu Tarts
Ingredients:
1 ½ pkg (255 g) frozen sweetened mini tart shells
2 cups (500 ml) Mascarpone cheese
1 ½ tbsp strong brewed coffee or coffee liqueur (Kahlùa or Tia Maria)
3 tbsp (30 mL) brown sugar
100g P.C. dark chocolate, melted
cocoa for garnish, if desired
Directions:
Preheat oven to 375
Bake unfilled tart shells in an oven for 10-12 minutes or until golden.
In a medium bowl combine Mascarpone, coffee liqueur and brown sugar; stir until combined and set aside or refrigerate until ready to use.
Spoon teaspoonfuls of melted chocolate into the bottom of each baked tart shell. Swirl around to ensure a taste of chocolate in every bite.
Place Mascarpone mixture into a Ziploc bag. Close the bag and cut a hole out of one end of the bag. Pipe out mixture into each tart shell. Place in refrigerator until ready to serve.
Sift cocoa over each just before serving.
Makes 18 tarts
Enjoy!
An overnight Crockpot Success..
I needed some chicken for my Buffalo Wing Dip and had a chicken in the fridge that was ready to be used and the herbs in my balcony garden were starting to grow so nicely. I came across this crockpot recipe for a chicken and it was perfect for my dip as the chicken was so tender and just fell off its bones. The rest of the chicken and bones, I used to make some chicken stock and store in the freezer for a later recipe.
Chicken with 40 Cloves Garlic
Ingredients:
2 sprigs fresh thyme
2 sprigs fresh rosemary
2 sprigs fresh sage
2 sprigs fresh Italian parsley
40 cloves garlic, unpeeled
1 onion, chopped
1 teaspoon salt
1/4 teaspoon ground black pepper
1 whole chicken
2 stalks celery
Directions:
Place sprigs of thyme, rosemary, sage, parsley and half of the garlic in chicken cavity. Place celery in stoneware. Put chicken on top of celery. Add remaining garlic around chicken. Sprinkle salt and pepper over chicken. Cover; cook on Low 8 - 10 hours (High 4 - 6 hours). To serve, place chicken, onions, garlic and celery on serving platter.
Note: You can squeeze roasted garlic out of skins onto toasted French bread slices and spread with knife topped with some crumbled goat cheese and a little rosemary. Yummy!
Enjoy!
A Light of Success in the Valley of Darkness...
...Wow the last couple of weeks have been muddled with many recipes that wouldn't dare make it on to this blog - yes, they were that bad!!! But as always through every long bad streak, there is always some little success that ever so slowly brings you out of those cooking doldrums and for me it was this recipe. I found it on one of my discussion boards tweaked it for a party that I was going to, so here goes:
Buffalo Wing Dip
Ingredients:
1 ½ packages low-fat cream cheese, softened
1 cup P.C. Buffalo Wing sauce, mild
1 cup Ranch dressing
2 cups cooked chicken - shredded or diced
1 cup shredded Cheddar cheese
Directions:
1. Preheat the oven to 350 degrees
2. In a medium bowl, stir together the cream cheese and hot pepper sauce until well blended. Mix in the Ranch dressing and chicken. Spread into a 9x13 inch baking dish. Sprinkle cheddar cheese over it.
3. Bake for 30 minutes in the preheated oven. Serve warm with tortilla chips and celery.
Note: use an already cooked rotisserie chicken from your local grocery store for a quick option to the chicken needed in this recipe.
Enjoy!
Tuesday, April 28, 2009
The Kickoff starts today...
The Kickoff to the theme of my 34th year on this Earth starts today: This is going to be my healthiest year EVER!!
Okay there I've said it and now actions will have to speak louder than words...
How did I come up up with the theme?
I've been subscribing to a daily inspiration email message from Neale Donald Walsh, the author of Conversations with God. The last one that I received that really drove me to a plan of action was this one:
...that taking better care of yourself is not merely a matter of good health, it is a measure of spiritual evolution.
Some people take better care of their car than they do of their body. Most people, in fact, pay little attention to their body until something goes wrong. Yet why create that kind of situation?
Look at what you are eating. How much and how often do you exercise? When was your last check-up? Are you treating your physical vehicle as if it is Divine? Good for you if you are. If you aren't...why not?
That is not to say that there won't be some potholes on the roadway and not all fuel going into this theme over the next year will be all no carbs, high protein, low fat, limited calories but I will aim to find a balance so that the goal of healthyness is rewarded with ultimate prize of happiness and fulfillment.
First plan of action: celebrate my birthday today with my girls and hubby. We're heading out to the closest Olive Garden. Their salad and breadsticks to die for... (never mind all of entrees on their menu). How do we plan to burn off this meal... A huge shopping spree at the Walden Galleria across the street :) It's a win, win situation for all... Second item on our to-do list: purchase a double jogging stroller so that the girls will join me on this year's new summer activity of choice: rollerblading along the waterfront...
So here I go and hope you will join me too... Enjoy!
Okay there I've said it and now actions will have to speak louder than words...
How did I come up up with the theme?
I've been subscribing to a daily inspiration email message from Neale Donald Walsh, the author of Conversations with God. The last one that I received that really drove me to a plan of action was this one:
On this day of your life, Helena, I believe God wants you to know...
...that taking better care of yourself is not merely a matter of good health, it is a measure of spiritual evolution.
Some people take better care of their car than they do of their body. Most people, in fact, pay little attention to their body until something goes wrong. Yet why create that kind of situation?
Look at what you are eating. How much and how often do you exercise? When was your last check-up? Are you treating your physical vehicle as if it is Divine? Good for you if you are. If you aren't...why not?
That is not to say that there won't be some potholes on the roadway and not all fuel going into this theme over the next year will be all no carbs, high protein, low fat, limited calories but I will aim to find a balance so that the goal of healthyness is rewarded with ultimate prize of happiness and fulfillment.
First plan of action: celebrate my birthday today with my girls and hubby. We're heading out to the closest Olive Garden. Their salad and breadsticks to die for... (never mind all of entrees on their menu). How do we plan to burn off this meal... A huge shopping spree at the Walden Galleria across the street :) It's a win, win situation for all... Second item on our to-do list: purchase a double jogging stroller so that the girls will join me on this year's new summer activity of choice: rollerblading along the waterfront...
So here I go and hope you will join me too... Enjoy!
Our Italian Themed Bridal Shower
In preparation for my brother in law's upcoming wedding, this wweekend we threw his beautiful bride-to-be a bridal shower with an Italian theme to honour her heritage. Here is a summary of what we did:
Roll the Cannelloni
You need a pair of pantyhose, an orange and a cannelloni. Put a cannelloni on the floor and an orange in one leg of the pantyhose. Tie the other leg (of the pantyhose) around your waist. The object is for you to swing your hips and hit the cannelloni (that you placed on the floor) across a designated area in the best time. You could also have 2 teams and have a relay.
Who Wears the Pants
The groom joined us before we began to open gifts and included him in our next game. Give each of the future bride and groom a roll of toilet paper. The first to completely unroll the toilet paper "Will be the One Who Wears The Pants in the Marriage". Everyone was laughing so hard and routing them on. It goes quickly once they figure out how to unravel it the fastest.
Prizes
Prizes included pasta bowls, wooden spoons, cheese shakers, gourmet olive oils, glass containers filled with pasta, red and white checkered place mats & napkins, Italian cookbooks and the Godfather movies on DVD.
Favors
Departing guests went away with delicious chocolate and white chocolate dipped biscotti cookies packaged in pretty bags tied with red and green ribbon with a tag that read “Amore Dolce: A love so sweet” Other sayings could be: “Sweet Beginnings!” or “How sweet it is that you could celebrate with us”
Guestbook
When guests arrived they participated in the door prize game and were also able to sign a Guestbook of photos of the bride-to-be and her fiancé. Alternatively, the guest book could be empty, have the guests sign it and then add pictures of the shower later on.
Kids Games and Activities
Cannelloni Bowling
Have the children colour their cannellonis and leave one white. Roll the white one into the centre of a room and take turns to see who can roll their cannelloni closest to the white one.
Cannelloni and Spoon Races
Cannelloni, a spoon and an area to run are all you need for this game. Variations could include relays and obstacle courses. To make it easy for younger kids, place the cannelloni lengthwise on their spoon or give them a smaller tubular pasta piece on their spoon. For the older kids place the cannelloni standing up on their spoon. If it tilts or falls over the kids have to start all over…
Find your Name Pasta
Write the name of each child on a cannelloni piece of pasta. The person that finds their own name wins a prize. Bigger pieces of pasta for small kids and smaller ones for the bigger kids.
Duck Walk Race
Have the kids line up at the Start Line, squat down and grasp their ankles with each hand from behind. On GO, they waddle to a designated Finish Line. They can't let go of their ankles or the are disqualified. The first child over the Finish Line wins a prize.
Dress Up Activity
The kids were asked to make with all the leftover pasta hats and necklaces for themselves and the bride-to-be. Once completed all the kids and the bride-to-be posed for photos.
Kids Prizes and Favors
Kids Prizes included: princess, Hannah Montana and Pirates of the Carribbean temporary tattoos. All kids left the day with animal-shaped collapsible tote bags filled with giant sidewalk chalk, that I found for $0.49 at a post-Easter sale.
I'll post pics soon but in the meantime enjoy!
Our Italian Inspired Bridal Shower
Décor
Red and white checkered tablecloths with small potted herbs as centerpieces. Great background music includes: Il Divo
Menu
Serve up a traditional Italian feast with a variety of pastas, variety of sauces (white, red, marinara), fresh Parmesan Cheese, antipasto salad, garlic bread and tiramisu and gelato desserts, iced tea and a good Chianti.
Top off the bridal shower with a homemade cookie buffet of cannoli, pizzelles, Mostaccioli, Pignoli, tiramisu, biscotti, and amaretti cookies.
Games
Door Prize
When the guests first arrive have them fill out a piece of paper with their wedding date or, if they are single, their birthday. The person with the date closest to the bride's wedding date wins the prize.
Name the Pasta
Created 10 bags with each bag holding a different variety of pasta. Number each bag from 1-10. Whoever guesses the most correct names win.
Trivia about the bride
Guests had to complete 10 trivia questions on the bride-to-be. The person with the most correct answers wins a prize.
Guessing Game
We played this game during our lunch. We filled a large glass jar with uncooked pasta. Have each guest guess how many pieces are in each jar. The person who guesses the closest to the true number of items in each jar gets to takes the goodies home and the fabulous recipe attached to it (or an Italian cookbook).
Read his Mind
Then we tested the bride-to-be on how well she knew her fiancé by asking her the following 12 questions.
1. What is his favorite pizza topping?
2. Where did you go on your first date?
3. What is his favorite drink?
4. If he could star in any tv show, which tv show would he pick?
5. If Steve were spending an evening at home, what would he most likely be doing?
6. What is the first movie you saw together?
7. If Steve were a superhero, who would he be?
8. What animal would Steve compare you to?
9. What is his grandmother’s names?
10. What was Steve’s first job?
11. How many clocks are in Steve’s room?
12. Name one thing Steve own’s that you will throw out the first chance you get?
13. Name one activity your fiancé does with you ONLY because he loves you?
We asked all the guests to write on a piece of paper a number from 1-12 to represent how many questions the bride-to-be would get right. The bride-to-be’s answers would have to match the pre-recorded answers from her fiancé, that we played off a host laptop. Her punishment for wrong answers was based on her own personal vice… red wine. We made red wine jello shots instead of the hard liquor variety for her to spoon out every time she got a question wrong. For all our guests who didn’t guess correctly how many the bride-to-be would get correct, also had to take a jello shot
Roll the Cannelloni
You need a pair of pantyhose, an orange and a cannelloni. Put a cannelloni on the floor and an orange in one leg of the pantyhose. Tie the other leg (of the pantyhose) around your waist. The object is for you to swing your hips and hit the cannelloni (that you placed on the floor) across a designated area in the best time. You could also have 2 teams and have a relay.
Who Wears the Pants
The groom joined us before we began to open gifts and included him in our next game. Give each of the future bride and groom a roll of toilet paper. The first to completely unroll the toilet paper "Will be the One Who Wears The Pants in the Marriage". Everyone was laughing so hard and routing them on. It goes quickly once they figure out how to unravel it the fastest.
Prizes
Prizes included pasta bowls, wooden spoons, cheese shakers, gourmet olive oils, glass containers filled with pasta, red and white checkered place mats & napkins, Italian cookbooks and the Godfather movies on DVD.
Favors
Departing guests went away with delicious chocolate and white chocolate dipped biscotti cookies packaged in pretty bags tied with red and green ribbon with a tag that read “Amore Dolce: A love so sweet” Other sayings could be: “Sweet Beginnings!” or “How sweet it is that you could celebrate with us”
Guestbook
When guests arrived they participated in the door prize game and were also able to sign a Guestbook of photos of the bride-to-be and her fiancé. Alternatively, the guest book could be empty, have the guests sign it and then add pictures of the shower later on.
Kids Games and Activities
Cannelloni Bowling
Have the children colour their cannellonis and leave one white. Roll the white one into the centre of a room and take turns to see who can roll their cannelloni closest to the white one.
Cannelloni and Spoon Races
Cannelloni, a spoon and an area to run are all you need for this game. Variations could include relays and obstacle courses. To make it easy for younger kids, place the cannelloni lengthwise on their spoon or give them a smaller tubular pasta piece on their spoon. For the older kids place the cannelloni standing up on their spoon. If it tilts or falls over the kids have to start all over…
Find your Name Pasta
Write the name of each child on a cannelloni piece of pasta. The person that finds their own name wins a prize. Bigger pieces of pasta for small kids and smaller ones for the bigger kids.
Duck Walk Race
Have the kids line up at the Start Line, squat down and grasp their ankles with each hand from behind. On GO, they waddle to a designated Finish Line. They can't let go of their ankles or the are disqualified. The first child over the Finish Line wins a prize.
Dress Up Activity
The kids were asked to make with all the leftover pasta hats and necklaces for themselves and the bride-to-be. Once completed all the kids and the bride-to-be posed for photos.
Kids Prizes and Favors
Kids Prizes included: princess, Hannah Montana and Pirates of the Carribbean temporary tattoos. All kids left the day with animal-shaped collapsible tote bags filled with giant sidewalk chalk, that I found for $0.49 at a post-Easter sale.
I'll post pics soon but in the meantime enjoy!
Thursday, April 23, 2009
Filipino Fish... mmm...
The original recipe that I used came out of a Learn how to cook Filipino Homestyle Dishes book that I have at home, although I did find an almost identical recipe at Pinoy Recipe. I’m not familiar with cooking fish but I couldn’t get myself to fry this fish, so I cooked it in the oven in a cup of white wine with some salt and pepper. I really don’t know what type of fish this is as I got it from our local grocery’s store's fish monger and it was very yummy! Reminder to self next time… ask what the fish is called :)

Escabeche
(Fried Fish with Sweet and Sour Sauce)
Ingredients:
1 red snapper or grouper fish, cleaned and scaled (about 2 lbs)
½ cup plain flour mixed with ½ tsp salt, for dredging
½ cup cooking oil
1 medium carrot, peeled and cut into 2” chunks
1 medium green pepper, cut into ½-inch strips
1 medium red pepper, cut into ½-inch strips
1 medium cucumber, peeled and cut into ½-inch rounds
2 boiled potatoes, quartered
Fresh coriander leaves (cilantro), to garnish
Sweet and Sour Sauce
½ cup sugar
½ tsp of salt
4 tbsp tomato ketchup
½ cup vinegar
1 tbsp cornstarch dissolved in ½ cup water
Directions:
Score the red snapper with slits all over and dredge in flour.
Heat oil in a wok and fry the fish and fry the fish about 10 minutes on one side and 7 to 8 minutes on the other side, until completely cooked and fish flesh is no longer glassy. Remove from pan and drain on paper towels. (Alternatively, I placed the fish in a glass baking dish, with all of the vegetables, seasoned with salt and pepper and cooked it in a cup of white wine & a cup of water, for 30 minutes at 375)
To make the sauce, combine sugar, vinegar, water and tomato ketchup in a saucepan. Add carrot, cook for about 5 minutes, then add peppers and cucumber. Simmer without stirring, for a further 3 minutes or until vegetables are tender yet firm. Stir in cornstarch mixture and simmer until sauce thickens. Remove from heat.
Arrange fish on a serving platter and arrange vegetables around fish. Pour sweet and sour sauce over fish.
Garnish with fresh coriander.
A Casserole...
I know, I know. This may sound like your typical family meal but I've never made a casserole before, so when I came across this recipe and tweaked it to make it a little more healthier :) it seemed easy enough...
Since hubby and I have gone overbudget this month (we both aren't sure how or why), I decided the only ingredient that would be cost efficient in this recipe would be tuna. On a side note my mom would kill me to be serving fish with dairy... But I have to admit this dish was yummy...

My Creamy Tuna Noodle Casserole
Ingredients:
3 cups Farfalle noodles, prepared according to package directions
3 tablespoons butter
227g (8 oz) of mushrooms
1/2 cup chopped onion
1/2 cup of frozen peas
1 tbsp garlic, minced
3 cans (3 oz. each) tuna, drained and flaked
1 can (10 oz. each) low-fat condensed cream of mushroom soup
1/2 can (6 fl. oz.) evaporated Milk
2/3 cup crushed ranch potato chips
3 tablespoons butter
227g (8 oz) of mushrooms
1/2 cup chopped onion
1/2 cup of frozen peas
1 tbsp garlic, minced
3 cans (3 oz. each) tuna, drained and flaked
1 can (10 oz. each) low-fat condensed cream of mushroom soup
1/2 can (6 fl. oz.) evaporated Milk
2/3 cup crushed ranch potato chips
Directions:
Preheat oven to 375° F. Grease small square baking dish.
Melt butter in large saucepan over medium heat. Add musrooms, peas and onion; cook, stirring occasionally, for 1 to 2 minutes or until vegetables are tender. Stir in noodles, tuna, soup and evaporated milk; mix well. Pour into prepared casserole dish. Sprinkle with potato chips.
Bake for 25 to 30 minutes or until chips are golden brown.
Next time, I might try one of the following substitutions for a little twist on a good thing:
- use codfish instead of tuna (I am Portuguese afterall)
- add 1/2 cup Monterey jack cheese before adding the chips
- add 3/4 cup shredded mozz and 1/4 cup taco cheese.
- add 2 stalks of celery and ½ cup of onions instead of peas and mushrooms
- use whole wheat noodles and wheat crackers instead of chips
Enjoy!
Wednesday, April 15, 2009
My Baked Treat of the Week...
...a caramelized pear tart recipe I had found in last week's grocery flyers... At a cost of less than $5.00 to make as I had many of the ingredients already at home, it was going to help me stay on budget too... but was it yummy??? oh yes, it was heard over Easter dinner as I had taken the tart to my in-laws for dessert.
The original recipe can be found on the Loblaws website. I didn't find that 3 pears was sufficient for this recipe so next time I will double it and use 6 pears. I also added 2 apples and substituted a tablespoon of vanilla extract for the pear brandy, as I didn't have any handy.
Caramelized Pear Tart
Ingredients:
3 pears, peeled and quartered (next time use 6 pears)
2 apples, peeled and quartered, optional
2 tbsp unsalted butter
½ cup sugar
1 pie shell
2 eggs
2/3 cup 15% table cream
5 tbsp powdered almonds
1 tbsp vanilla extract (or pear brandy)
vanilla ice cream, to taste
Directions:
1. Preheat oven to (350°C)
2. Caramelize pear and apple sections in butter with sugar, approximately 10 minutes.
3. Arrange pears in pie shell. Mix together eggs with remaining sugar, cream, powdered almonds and vanilla extract, if using. Pour mixture over pears and apples.
4. Bake in oven for about 25 minutes. Let rest 3 minutes prior to serving with vanilla ice cream.
Enjoy!
Tuesday, April 14, 2009
Words of hope, love and inspiration...
As many of you know, I have been truly blessed to have married into a BIG wonderful, religious, supportive and loving Filipino family. To this day I sometimes still feel challenged at trying to remember everyone's name and where they fit in our family tree. But every day I seem so in awe of them all and today was going to be no exception. Here is a little excerpt of an email that came through my inbox from one of our uncle's who wanted to provide a little message of hope to the young couples in our family regarding marriage and the challenges they may or are facing:
"We’ve been married for 31 years but our marriage is not perfect, no one’s is, nothing is
and nobody is. For that period of time, we fought/argued so many times, some serious, some silly, some petty; over finances, about our beliefs, values, about our careers, about raising our children, other people we’re jealous of, over almost everything. We said words you wouldn’t imagine we’re capable of saying, words that hurt, words that are hard to take back. But each time, we’re able to reconcile, one of us or both of us would say ‘Sorry’ (a lot of people say, saying ‘Sorry’ is a sign of weakness, a sign of surrendering something or giving the other party a blanket “you-can-do-whatever-you-want-from-now-on” authority but it’s not, it’s actually a sign of courage, of maturity and of love and respect- we believe in that) and then, there’s forgiveness…..and…… we moved on and each time, our relationship got more resilient, our bond got stronger. We became more mature and understanding to each other, more open and yes,….. more loving and forgiving… So our marriage lasted this long….. not because of me, not because of your Auntie but because of our love and respect for each other, because of our children, because of you, our family….and most of all, because of us…and God, the third party in a marriage."
Hope it provides you with a source of inspiration too. Enjoy!
Hoisin sauce...
Since I had to go out of my way to purchase a bottle of hoisin sauce for the previous recipe, I thought I would look for a side dish that also used hoisin sauce too...
Funny the things you can find online when you are doing a simple search ;) but luckily I came across this Chicken and Hoisin Fried Rice and I was so happy with the end result. The only change I made to the recipe was to eliminate the chicken and made the rice earlier in the day in the rice cooker.
Chicken and Hoisin Fried Rice
Ingredients:
1 cup long-grain rice
1 Tbsp vegetable oil
2 skinless boneless chicken breasts
1 cup diced red bell pepper
1/3 cup chicken stock
1 cup diced snow peas
3 Tbsp low-sodium soy sauce
1 1/2 tsp minced fresh garlic
3 Tbsp hoisin sauce
1 tsp minced fresh ginger
2/3 cup chopped carrots
2 green onions, chopped
Directions:
1.Bring 1 1/4 cups of water to a boil in a saucepan. Stir in the rice. Cover, reduce the heat to low and cook for 12 minutes. Remove from the heat. Let stand, covered, for 10 minutes. Transfer to a bowl. Cool.
2.While the rice is cooking, preheat the barbecue or a non-stick grill pan to medium-high and spray with cooking oil. Cook the chicken for 6 minutes per side, or until cooked through and no longer pink in the center. Dice and set aside.
3.Whisk the stock, soy sauce and hoisin sauce in a small bowl. Set aside.
4.Cook the carrots in a pot of boiling water until tender-crisp, about 4 minutes. Drain.
5.Spray a non-stick wok or large skillet with cooking oil, add the vegetable oil and place over high heat. Add the red peppers, snow peas, garlic, ginger and carrots; cook for 2 minutes, stirring constantly. Add the cooled rice and cook, stirring, for 2 minutes longer. Stir in the stock mixture and the chicken. Cook for 1 minute longer, until heated through.
6.Serve immediately, garnished with green onions.
Enjoy!
Chicken Thighs... Thai style...
I was browsing through the canadian living website the other day and came across this Thai Thighs recipe. Always looking for a new way to do chicken, this one caught my eye. Plus, it helped that it used one of my favorite ingredients of all time: peanut butter! I didn't make any revisions to the original recipe. Hubby and I were quite impressed and now this will be a new dish in our rolling monthly menus.
Thai Thighs
Ingredients:
1/3 cup (75 mL) Minced green onions
2 cloves garlic, minced
3 tbsp (50 mL) hoisin sauce
2 tbsp (25 mL) peanut butter
1 tbsp (15 mL) Minced gingerroot
1 tbsp (15 mL) soy sauce
1 tbsp (15 mL) sesame oil
1 tbsp (15 mL) lemon juice
1/2 tsp (2 mL) hot pepper sauce
2 lb (1 kg) chicken legs or thighs
2 tbsp (25 mL) Chopped fresh coriander or parsley
Directions:
In bowl, combine 1/4 cup (50 mL) of the onions, garlic, hoisin sauce, peanut butter, ginger, soy sauce, sesame oil, lemon juice and hot pepper sauce. Arrange chicken in shallow baking dish. Spoon sauce over chicken and bake in 375°F (190°C) oven for 45 to 50 minutes or until golden brown and juices run clear when pierced with a fork. Sprinkle with remaining green onion and coriander.
Enjoy!
P.S. Sorry for no pictures this week but life has been too hectic... I know cheap excuse for a photography student :)
Monday, April 13, 2009
Bananas in a brownie...
I love bananas as much as the next guy but with bananas ripening by the minute in our dry and hot apartment, the thought of making another banana bread or breakfast shake just didn't get me going. So when I came across this recipe that used bananas in a "brownie" on meals.com, I jumped right in... Gosh these were delicious!! I wonder if these bars count as an extra serving of a fruit ;)

2 cups all-purpose flour
2 teaspoons baking powder
1/2 teaspoon salt
3/4 cup (1 1/2 sticks) butter or margarine, softened
2/3 cup sugar
2/3 cup packed brown sugar
1 teaspoon vanilla extract
3 medium mashed ripe bananas
1 large egg
2 cups (12-oz. pkg.) NESTLÉ® TOLL HOUSE® Semi-Sweet Chocolate Mini Morsels
Powdered sugar
PREHEAT oven to 350°F. Grease a 15x10-inch jelly-roll pan.
COMBINE flour, baking powder and salt in medium bowl. Beat butter, granulated sugar, brown sugar and vanilla extract in large mixing bowl until creamy. Beat in bananas and egg. Gradually beat in flour mixture; stir in morsels. Spread into prepared jelly-roll pan.
Banana Mini Morsel Bars
Ingredients:
2 cups all-purpose flour
2 teaspoons baking powder
1/2 teaspoon salt
3/4 cup (1 1/2 sticks) butter or margarine, softened
2/3 cup sugar
2/3 cup packed brown sugar
1 teaspoon vanilla extract
3 medium mashed ripe bananas
1 large egg
2 cups (12-oz. pkg.) NESTLÉ® TOLL HOUSE® Semi-Sweet Chocolate Mini Morsels
Powdered sugar
Directions:
PREHEAT oven to 350°F. Grease a 15x10-inch jelly-roll pan.
COMBINE flour, baking powder and salt in medium bowl. Beat butter, granulated sugar, brown sugar and vanilla extract in large mixing bowl until creamy. Beat in bananas and egg. Gradually beat in flour mixture; stir in morsels. Spread into prepared jelly-roll pan.
BAKE for 20 to 30 minutes or until wooden pick inserted in center comes out clean. Cool completely in pan on wire rack. Sprinkle with powdered sugar.
My tips: The variations made to the original recipe above included using butterscotch chips instead of the mini morsels (I really enjoy that combination) and eliminating the powdered sugar altogether. Next time, I will line my baking sheet with parchment paper to add an extra element of protection from the bottom of the bars burning.
Enjoy!
Spinach leftovers...
As much as hubby and I are trying to be healthy and staying on our grocery budget for the month, salads and greens always seem to be items that we don't "get around" to using very often although we always include them in our weekly grocery lists :) But I was refusing to throw a pound of spinach away and came up with the following recipe. Although the base of this recipe was from a recipe on meals.com, I've included below my changes to it. Hope you enjoy it as much as we did...

Spinach Pie
Ingredients:
1 tsp olive oil
3 green onion, chopped
8 cups of loosely packed spinach
1 pie crust
3 large eggs, lightly beaten
1 1/2 cups crumbled feta cheese
2 portobello mushrooms, chopped
1/2 orange sweet pepper, chopped
3/4 cup evaporated milk
2 tablespoons all-purpose flour
2 teaspoons fresh dill
2 teaspoons fresh parsley
1/2 teaspoon ground black pepper
1/4 cup grated Parmesan cheese
Directions:
Preheat oven to 350° F.
In a large skillet, heat the olive oil until shimmering. Add the onions and sauté until tender. Stir in the spinach and then turn off the heat. The spinach will start to wilt down, but not much. Let cool slightly.
To the spinach mixture, add eggs, feta cheese, milk, flour, dill and pepper in medium bowl; pour into pie crust. Top with Parmesan cheese.
Bake for 35 to 40 minutes or until set; let stand for 10 minutes.
Enjoy!
Easter has come and gone...
...leaving tons of leftovers in our fridge, lunch and dinner is taken care of for today which gives me some spare time to blog of some fun recipes I have tried recently :)
I'm always interested in adding veggies to my daughter's dinner plate and came across this recipe on the back of a Rice Krispies cereal box for Savoury Sweet Potato fries. She likes the cereal and fries is a favorite too, how about combining the two?
My daughter didn't take to the fries very well but hubby and I couldn't stop ourselves from enjoying each and every one of them and since they were baked and not fried, it didn't leave us with a guilty after taste ;)

Savoury Sweet Potato Sticks
Ingredients:
3 medium sweet potatoes (about 750 g/1 1/2 lbs)
3 cups RICE KRISPIES* cereal crushed to 375 mL (1 1/2 cups)
1/4 tsp each: garlic powder onion powder and salt (or seasoning salt)
1/8 tsp cayenne pepper
1/2 cup all-purpose flour
4 egg whites
4 tbsp water
Ingredients:
3 medium sweet potatoes (about 750 g/1 1/2 lbs)
3 cups RICE KRISPIES* cereal crushed to 375 mL (1 1/2 cups)
1/4 tsp each: garlic powder onion powder and salt (or seasoning salt)
1/8 tsp cayenne pepper
1/2 cup all-purpose flour
4 egg whites
4 tbsp water
Directions:
1. Wash sweet potatoes (or peel if desired). Cut lengthwise into 1 cm (1/2-inch) slices. Cut slices into 1 cm (1/2-inch) sticks.
2. In large plate or shallow pan, mix together crushed cereal and seasonings. Place flour on second plate. In medium bowl, beat egg whites and water.
3. Coat potatoes with flour, shaking off excess. Next dip in egg mixture, then coat with cereal mixture. Place in single layer on foil-lined baking sheet coated with cooking spray.
4. Bake at 200°C (400°F) about 25 minutes or until lightly browned and tender when tested with sharp knife. Serve hot with salsa or roasted garlic mayonnaise if desired.
Enjoy!
Tuesday, April 7, 2009
Taco Leftovers
A couple of weeks ago for March Break we hosted a fun sleepover for the kids in our family and a Doggie Birthday Party for our little jack russell Dumbo who turned 13 years old. Where has all the time gone. A quick and easy dinner for the kids of soft and hard tacos became a quick Taco Pizza lunch for me the next day.
Taco Pizza

Taco Pizza
I had some Lebanese flatbreads in the fridge, mixed it with mild salsa, then spread the meat mixture on the bread and topped it with shredded cheddar cheese. I placed it in a preheated oven of 350 and baked it for approximately 12 minutes until the cheese had melted and it was heated through.
Enjoy! I know I did :)
Baked Leftovers...
I found this great recipe for pumpkin bread on Meals.com. I had some leftover pumpkin that I really wanted to use and needed to bake a recipe for the week so this one was it :)
We froze some of the leftovers in little freezer bags with 2 slices. The night before we would take them out to thaw, butter the slices in the morning and it became a great alternative for breakfast. Even our little toddler loved it which makes any recipe an added bonus in our home.

Spiced Pumpkin Bread
Ingredients:
2 cups all-purpose flour
5 teaspoons ground allspice or pumpkin pie spice
2 teaspoons baking powder
1/2 teaspoon baking soda
1/2 teaspoon salt
1 cup LIBBY'S® 100% Pure Pumpkin
1 cup packed brown sugar
1/2 cup Apple NESTLÉ® JUICY JUICE® All Natural 100% Juice
2 large eggs
2 tablespoons vegetable oil
1 teaspoon vanilla extract
Directions:
PREHEAT oven to 350° F.
SIFT flour, allspice, baking powder, baking soda and salt into medium bowl. Combine pumpkin, sugar, Juicy Juice, eggs, oil and vanilla extract in large bowl; stir well. Stir in flour mixture just until moistened. Spoon into greased 9 x 5-inch loaf pan.
BAKE for 65 to 70 minutes or until wooden pick inserted in center comes out clean. Cool in pan on wire rack for 10 minutes; remove to wire rack to cool completely.
Enjoy!
More Leftovers...
So hubby and I tried very hard last month to stay on budget and for the first time in a year we both actually made RRSP contributions (who would have thought especially with being on mat leave). Although the temptation was there to go out to eat (many times!) we had to think twice in most cases. This day was going to be no exception so I looked very quickly in the fridge to find something I could throw together I came across some leftovers from our Slowcooker Pot Roast
Visiting my handy dandy Canadian Living Magazine, I found this great recipe for the beef leftovers. Not having had any pizza dough, I used the fresh Portuguese buns I had picked up that morning for my base and turned them into an open-faced sandwich... Wow was this every quick and delicious!!

Philly Cheese Steak Pizza
Ingredients:
1 tbsp (15 mL) extra-virgin olive oil
1 sweet green pepper, sliced
2 cloves garlic, minced
Half sweet onion, sliced
2 cups (500 mL) sliced mushrooms
1 tsp (5 mL) dried oregano
1/4 tsp (1 mL) each salt and pepper
1 lb (500 g) pizza dough
1/2 cup (125 mL) pizza sauce
8 slices provolone cheese
1 cup (250 mL) thinly sliced cooked roast beef
Preparation:
In large skillet, heat oil over medium-high heat; sauté green pepper, garlic, onion, mushrooms, oregano, salt and pepper until onion is golden and no liquid remains, about 5 minutes. Set aside.
On lightly floured surface, roll out pizza dough to fit 12-inch (30 cm) pizza pan. Spread with pizza sauce. Arrange half of the cheese over sauce; spoon vegetable mixture over top. Top with roast beef and remaining cheese.
Bake in bottom third of 500°F (260°C) oven until crust is golden and cheese is bubbly, about 10 minutes.
Enjoy!
Thursday, March 26, 2009
Mini Meat Loaves... what a perfect portion size too!
I've been making this recipe for years but for whatever reason never seemed to have written it down until today. I had some leftover ground beef from the tacos we made for the kids sleepover and this was the perfect and easiest recipe to use it in.
Note: Please don't mind the paper plates but I was determined to not do any dishes that night! LOL!

Mini Meat Loaves
Ingredients:
1 tablespoon olive oil
½ chopped yellow onions
1 tsp minced garlic
1 tsp Italian seasoning
1 tsp salt
1 tsp freshly ground black pepper
1 egg, beaten
2 tsp Worcestershire sauce
2 tsp red wine vinegar
1 pound extra lean ground beef
1/2 cup plain dry bread crumbs
1/2 cup ketchup
Directions:
Preheat the oven to 350 degrees F. Spray a muffin tray with nonstick cooking spray.
Heat the olive oil in a medium saute pan. Add the onions, garlic, seasoning, salt, and pepper and cook over medium-low heat, stirring occasionally, for 8 to 10 minutes, until the onions are translucent but not brown. Remove from heat and allow to cool slightly.
In a bowl, add egg, worcestershire sauce and red wine vinegar.
In a large bowl, combine the ground beef, onion mixture, bread crumbs, and egg mixture, and mix lightly with a fork. Don't mash or the meatloaf will be dense. Divide the mixture into 6 muffin tins, filling the remaining muffin areas with water to prevent any burning. Spread about a tablespoon of ketchup on the top of each portion.
Bake for 30 to 35 minutes, until the meat is cooked through. Serve with mushroom mashed potatoes and steamed carrots
Enjoy!
Great side dishes...
Determined to not have any of the veggies in the fridge go to waste, I made the following 3 side dishes to go along with the Crock Pot Spare Ribs. All 3 recipes can be found in the Canadian Living magazine Make Ahead Meals Boy, was I impressed...
Green Beans and Sherried Mushrooms (p.68)
Ingredients:
1 lb green beans, trimmed
1 tbsp extra-virgin olive oil
1 package mushrooms, chopped
1 clove garlic, minced
1 tsp dried thyme
¼ tsp each salt and pepper
1 tbsp each dry sherry and butter
Directions:
In skillet blanch beans in boiling water, until tender-crisp and colour deepens, about 5 minutes. Drain and chill under cold water, pat dry.
Wipe out skillet, heat oil over medium-high heat; sauté mushrooms, garlic, thyme, salt and pepper until golden all over, about minutes.
Add sherry; cook until evaporated. Add beans and butter; cook, stirring, until beans are hot and butter is melted.
Basmati Rice with Pesto (p.70)
Added 1 ½ cups of rice to 1 ¾ cups of water in the rice cooker and once done added 2 tbsp of pesto… Stir well. Yummy alternative to just your plain rice.
Crunchy Coleslaw (p. 48)
Ingredients:
1/4 cup (50 mL) vegetable oil
2 tbsp (25 mL) lemon juice
1 tbsp (15 mL) dijon mustard
1 clove garlic, minced
1/4 tsp (1 mL) each salt and pepper
1 ½ cups (375 mL) shredded cabbage
½ cup (250 mL) grated carrots
Directions:
In a separate bowl, whisk together oil, lemon juice, mustard, garlic, salt and pepper. Add cabbage, and carrots; toss to coat.
Enjoy!
Spare Ribs... and still on budget...
Okay so I've fallen behind already with trying to keep up with my weekly list of updates but I have been cooking regularly so that's always a bonus right? With a goal this month to really try to stay on budget and not to waste food, I'm so excited to say that we've been really good about it (even with hosting a birthday party and a sleepover for 10 kids) . Yes, there is always room for improvement but we are in much a better position than where we were a couple of months ago. With only a couple more days left in the month, we'll see if this month will be a success or a learning experience :)
In the meantime, while at the grocery store a couple of days go, I came across a sale with 2 racks of sideribs for the low price of $6.00. With only a mere 24 hours before meeting the expiry date, threw these ribs into the crockpot and dinner was ready in just a couple of hours with some yummy side dishes too. The original recipe can be found using the link below as I've made changes to the recipe that are reflected already below.

Ingredients:
1/2 cup Ketchup
1/2 cup BBQ sauce
1 tbsp Worcestershire sauce
1 cup Water
1/4 cup Vinegar
1 tbsp Brown sugar
1 tsp Sugar
1 tbsp Dehydrated onion
2 racks of side ribs, (cut in 4 ribs)
1 tbsp Worcestershire sauce
1 cup Water
1/4 cup Vinegar
1 tbsp Brown sugar
1 tsp Sugar
1 tbsp Dehydrated onion
2 racks of side ribs, (cut in 4 ribs)
Directions:
Combine all ingredients in crock pot and stir well. Add the spare ribs. Cook on LOW for 8 hours. Once ready, pour crockpot liquid into a pan to thicken sauce. I added a tbsp of cornstarch dissolved in 1 cup of cold water to the liquid, put it to heat until it reduced and thickened to my likening. I then took the sauce and poured it on the ribs in the crockpot, although you could serve it on the side with the ribs.
Serve with pesto rice, crunchy coleslaw and/or green beans with sherried mushrooms.
Enjoy!
Monday, March 23, 2009
Picture of the Week
Pantuffas

Setting: Aperature Priority
Lighting: Natural
ISO: 560
f4.0
Shutter Speed: 1/30
Enjoy!
Wednesday, March 11, 2009
Picture of the Week
Here's my favorite picture of the week...

Our new addition
Setting: Aperature Priority
Lighting: Natural
ISO: 500
f4.8
Shutter Speed: 1/30
Enjoy!
Tuesday, March 10, 2009
Mini Quiches...
I'm a Quiche Virgin...

This was my first time making a quiche, don't know why but I've always shied away from them. I made them as minis as I wasn't sure how they'd turn out. Didn't realize how easy and delicious they could be... The original recipe came from the Better Homes and Garden website but not having enough time to make my own dough I bought ready-made unsweetened tart shells for my base. The original recipe can be found by following the link below but the recipe below reflects the changes I made to the original recipe.
Individual Ham and Cheese Quiches
Ingredients:
2 packages unsweetened tart shells (12 per package)
½ cup shredded mozzarella cheese
½ cup finely chopped sweet red pepper
¼ cup finely chopped cooked ham
1 tbsp thinly sliced green onion
2 tbsp all-purpose flour
¼ tsp Italian seasoning
1/8 tsp salt
1/8 tsp ground black pepper
2 eggs, slightly beaten
2/3 cup Evaporated Milk
Directions:
1. Preheat oven to 400 degrees F.
2. Place tart shells on a baking sheet. Bake in preheated oven for 7 minutes or until pastry is slightly golden. Remove from oven. Reduce oven temperature to 350 degrees F.
3. In a medium bowl combine cheese, red pepper, ham, green onions, milk, eggs, flour, salt and black pepper; mix well. Spoon mixture into shells, filling 3/4 full.
4. Bake for 20 to 25 minutes minutes or until filling is set. Let stand 5 minutes before serving. Cool slightly; lift quiche from cup with tip of knife. Serve warm or cool and freeze for later entertaining.
Kitchen Tip: To make one large quiche: Line a 10-inch tart pan with removable bottom with one piecrust (reserve remaining piecrust for another use). Line with double thickness of foil. Bake in 400 degrees F. oven for 7 minutes. Remove foil; bake 8 to 9 minutes longer or until pastry is set, dry and lightly browned. Spoon mixture evenly in shell. Bake in 325 degrees F oven for 30 minutes or until set. Let stand 10 minutes before serving.
Enjoy :)
A Christmas Post in March???
I've been meaning to post these cookie recipes since Christmas but haven't had a chance. It's only 9 weeks late...oops...
This Christmas we decided since we were attending many holiday parties that we would create some holiday tins filled with cookies. The "we" ended up becoming only "me" but hubby took care of the kids while I baked, so it was definitely a collaborative effort :)

Since I didn't have any favorite cookie recipes I decided to try the following new ones and they were a hit! The Ranger cookies were very easy to make but keep an eye on them as they can burn very quickly around the edges. The Gingerbread cookie recipe came from a company that does alot of holiday fundraising at Sherway Mall during the Christmas season and they were very happy to share their recipe. They make tons of these cookies and at the mall children can come up and decorate them and they are sold to the public to raise money for local charities. I found this recipe needed a little tweaking for next time but not sure yet what it will be...but keep tuned for a variation of this recipe in next year's post. The sugar cookie recipe came from Ashlee's website and it was a hit too... although I didn't have time to ice them this time around. Just another excuse to attempt this recipe once again :)

Ranger Cookies (from Betty Crocker)
Ingredients:
1 package Betty Crocker Oatmeal Mix
½ cup butter/margarine
1 tbsp water
1 egg
¾ cup Rice Krispies cereal (Vanilla flavored)
½ cup flaked sweetened coconut
Directions:
Heat oven to 375°F (190°C). In large bowl, stir all ingredients until soft dough forms.
Drop dough by rounded teaspoonfuls 2 inches (5 cm) apart onto ungreased baking sheet.
Bake 10 to 12 minutes or until edges are golden brown.
Cool 1 minute; remove from cookie sheet. Cool completely.
Kitchen Tip: Toss 1/2 cup peanut butter chips, chocolate chips or a combo of both into the dough for extra flavour.
GINGERBREAD COOKIE (The Gingerbread Cookie Factory)
Ingredients:
½ cup sugar
½ cup shortening
1 egg
½ cup light molasses
2 ¼ cup flour
4 tsp pumpkin pie spice
1 tsp baking powder
½ tsp salt
½ tsp all spice
Directions:
Cream sugar and shortening.
Add egg and molasses; blend.
Mix in dry ingredients.
Chill dough for 1 hour. Roll out dough to 1/8 in. thickness. Cut into desired shapes.
Bake at 350 degrees for 8 to 9 minutes.
Ashlee's My Famous Sugar Cookies
Ingredients:
1 1/2 cups butter
1 1/2 cups granulated sugar
1/2 cup powdered sugar
4 eggs
1 tsp. vanilla
1/2 tsp. almond extract
1 tbsp. lemon zest
5 cups flour
2 tsp. baking powder
1 tsp. salt
Powdered sugar, for rolling
Directions:
Preheat oven to 400 degrees. Line a cookie sheet with parchment paper.
Cream butter and sugars in a mixer for 5 minutes. Add in eggs one at a time, mixing thoroughly. Add in vanilla, almond, and lemon zest. Sift in flour, baking powder, and salt a little at a time. Do not over mix, this process should take about one minute.
Chill dough for up to a week in the fridge, or roll out and cut right away. Bake cookies for 12 minutes.
Ice with basic buttercream if desired.
Enjoy :)
This Christmas we decided since we were attending many holiday parties that we would create some holiday tins filled with cookies. The "we" ended up becoming only "me" but hubby took care of the kids while I baked, so it was definitely a collaborative effort :)
Since I didn't have any favorite cookie recipes I decided to try the following new ones and they were a hit! The Ranger cookies were very easy to make but keep an eye on them as they can burn very quickly around the edges. The Gingerbread cookie recipe came from a company that does alot of holiday fundraising at Sherway Mall during the Christmas season and they were very happy to share their recipe. They make tons of these cookies and at the mall children can come up and decorate them and they are sold to the public to raise money for local charities. I found this recipe needed a little tweaking for next time but not sure yet what it will be...but keep tuned for a variation of this recipe in next year's post. The sugar cookie recipe came from Ashlee's website and it was a hit too... although I didn't have time to ice them this time around. Just another excuse to attempt this recipe once again :)
Ranger Cookies (from Betty Crocker)
Ingredients:
1 package Betty Crocker Oatmeal Mix
½ cup butter/margarine
1 tbsp water
1 egg
¾ cup Rice Krispies cereal (Vanilla flavored)
½ cup flaked sweetened coconut
Directions:
Heat oven to 375°F (190°C). In large bowl, stir all ingredients until soft dough forms.
Drop dough by rounded teaspoonfuls 2 inches (5 cm) apart onto ungreased baking sheet.
Bake 10 to 12 minutes or until edges are golden brown.
Cool 1 minute; remove from cookie sheet. Cool completely.
Kitchen Tip: Toss 1/2 cup peanut butter chips, chocolate chips or a combo of both into the dough for extra flavour.
GINGERBREAD COOKIE (The Gingerbread Cookie Factory)
Ingredients:
½ cup sugar
½ cup shortening
1 egg
½ cup light molasses
2 ¼ cup flour
4 tsp pumpkin pie spice
1 tsp baking powder
½ tsp salt
½ tsp all spice
Directions:
Cream sugar and shortening.
Add egg and molasses; blend.
Mix in dry ingredients.
Chill dough for 1 hour. Roll out dough to 1/8 in. thickness. Cut into desired shapes.
Bake at 350 degrees for 8 to 9 minutes.
Ashlee's My Famous Sugar Cookies
Ingredients:
1 1/2 cups butter
1 1/2 cups granulated sugar
1/2 cup powdered sugar
4 eggs
1 tsp. vanilla
1/2 tsp. almond extract
1 tbsp. lemon zest
5 cups flour
2 tsp. baking powder
1 tsp. salt
Powdered sugar, for rolling
Directions:
Preheat oven to 400 degrees. Line a cookie sheet with parchment paper.
Cream butter and sugars in a mixer for 5 minutes. Add in eggs one at a time, mixing thoroughly. Add in vanilla, almond, and lemon zest. Sift in flour, baking powder, and salt a little at a time. Do not over mix, this process should take about one minute.
Chill dough for up to a week in the fridge, or roll out and cut right away. Bake cookies for 12 minutes.
Ice with basic buttercream if desired.
Enjoy :)
March's Book of the Month...
I love to read anything really from textbooks, magazines to novels and even camera manuals ;) With the pressures of everyday life as a mom of 2, the last couple of weeks found me with very little time and interest in taking on a new book. But when my sister lent me this book I immediately placed it on my bedside table as my next read. Little did I realize that 6 weeks had passed and I still hadn't picked it up...
So when I finally got around to it, I was hooked and would definitely recommend it to anyone who wants an easy read and a good laugh...
Sophie Kinsella's Remember Me?
Anyone else read it? What did you think?
So when I finally got around to it, I was hooked and would definitely recommend it to anyone who wants an easy read and a good laugh...
Sophie Kinsella's Remember Me?
Anyone else read it? What did you think?
Leftovers in a Pie...
With so many leftovers from last night’s Slow Cooker Pot Roast, I was excited once again to revisit my Canadian Living Special Issue magazine… With 3 options for these leftovers, I decided to select The Shepherd’s Pie recipe on page 46. Now if leftovers could taste like this all the time, I’d be in heaven and have way more time for myself. This recipe was definitely a keeper for our family, hope you think so too…
Canadian Living Shepherd’s Pie
Ingredients:1 tbsp (15 mL) vegetable oil
1 large onion, chopped
1 tsp (5 mL) dried thyme
2 tbsp (30 mL) all-purpose flour
4 cups chopped cooked Sirloin Tip Oven Roast
1 cup Porcini Mushroom Jus (recipe below)
1 bag of small potatoes (454 g)
1 large carrot, peeled and shredded
1 cup (250 mL) milk, warm
4 tsp (20 mL) butter, softened
1/2 tsp (2 mL) each salt and pepper
1 cup (250 mL) leftover peas & corn
Directions:
In large nonstick skillet, heat oil over medium-high heat; cook onion and thyme, stirring occasionally, until softened and golden, about 5 minutes.
Sprinkle with flour; cook, stirring for 1 minute. Add beef, jus and ½ cup water; simmer for 2 minutes. Spread in 8-inch square glass baking dish.
In saucepan of boiling salted water, cover and cook potatoes (with skin, chopped in ½ ) until tender, about 8 minutes. Drain potatoes and return to dry saucepan; mash together with warm milk, butter, salt and pepper until smooth.
Scrape beef mixture into 8-inch (2 L) square glass baking dish. Cover with shredded carrots, peas and corn; spread mashed potatoes over top. Bake in 400°F (200°C) oven until filling is bubbly and potatoes are golden, about 40 minutes.
Make-ahead: Cover and refrigerate for up to 24 hours; add 20 minutes to baking time.
Porcini mushroom Jus:
1 pkg (14 g) dried porcini mushrooms
1 tbsp (15 mL) vegetable oil
1 clove garlic, minced
Pinch dried thyme
Pinch salt
1 tbsp (15 mL) brandy or sodium-reduced beef stock
1-1/2 cups (375 mL) sodium-reduced beef stock
Preparation:
Soak mushrooms in 1 cup (250 mL) boiling water for 20 minutes. With slotted spoon, remove mushrooms and chop. Strain liquid and set aside.
In saucepan, heat vegetable oil over medium heat; fry garlic, thyme, salt and mushrooms until softened, about 2 minutes. Add brandy; cook, stirring, until no liquid remains.
Add stock and reserved pan/mushroom juices; bring to boil. Reduce heat and simmer, uncovered, for about 8 minutes or until reduced to about 2 cups (500 mL).
Note: I ended up using all of this jus in my Shepherd’s Pie as it was that yummy :)
Enjoy!
Monday, March 9, 2009
A Birthday Party on a budget...
This weekend I was determined to host a dinner party for 11 guests at our place, to celebrate our special friend’s birthday but I was hesitant to spend anymore than $40 to do it. In the past I’ve never really had a budget and usually found myself stepping into the grocery store and coming out with more than $100 worth of groceries, some of which never got used but this time it would be different. I would schedule and plan out each component of the meal and head to the store only once with my list. I’m proud to say it worked…
Our Birthday Menu consisted of:
Roasted Garlic - Garlic Bread
Helena’s Meat Lasagna
Baked Ravioli in Alfredo Sauce
Caesar Salad
Fresh Fruit Tarts
Ice Cream Birthday Cake (my gift to the birthday boy)
Some of the above are my tried and true favorites but I did try a new recipe that I created from a variety of different recipes I found online and this one was a favorite among all of our guests. Hope you enjoy it as much as we did…
Baked Ravioli in Alfredo Sauce
Ingredients
3 pkg.frozen Four Cheese Ravioli, cooked, drained, as per package
6 tablespoons unsalted butter
½ small red onion, minced
½ tsp minced garlic
1 package of sliced mushrooms
2 cup heavy cream
1 cup finely grated Parmigiano-Romano cheese
1/2 teaspoon salt
1/4 teaspoon freshly ground black pepper
2 tablespoon Parmesan Cheese
2 tablespoon bread crumbs
Directions
Preheat oven to 400º F. Grease an 8-inch-square baking dish.
Bring a pot of water to a rolling boil then add salt. Add ravioli and cook for 8 minutes to al dente.
While the pasta is cooking, melt the butter in a medium saucepan over medium-high heat. Add shallots, garlic. mushrooms and saute until tender. Add heavy cream and cheese, and bring to a boil. Cook until sauce has reduced slightly, about 5 minutes. Remove from the heat. Add salt and pepper to taste. Stir in pasta. Pour into prepared baking dish. Sprinkle cheese and bread crumbs over pasta mixture; cover with foil.
Bake for 20 minutes. Uncover; bake for additional 5 minutes or until golden brown.
Enjoy!
Frugal dinners and yummy leftovers...
..who would have thought...
My husband and I are really trying to make healthier and more frugal choices for our meal. Some months we can rack over $800 on grocery bills and dining out… Lord, forgive us for the amount of food that some months we may throw out due to spoilage or lack of time and ideas as to what to do with all of the food in our fridge.
So during a grocery store run for little essentials, I came across a Canadian Living Special Issue: Make Ahead Meals: Cook Now, Save Time Later. So this month this little magazine of 96 pages will be my inspiration.
Today I start with a recipe from page 45: Sirloin tip Oven Roast with Porcini Mushroom Jus … This basic recipe was to provide for at least another 4 recipes that would use leftovers but of course I had to make a little change to accommodate for my lack of time, placed it into the Slow Cooker with all of my vegetables for a one pot dish…
Slow Cooker Pot Roast
Ingredients
3 pounds outside round roast
6 cloves garlic, minced
1 tbsp vegetable oil
1 tsp each dried thyme and pepper
1 packet dry onion soup mix
1 cup beef stock
3 carrots, chopped
1 onion, chopped
12 mini white potatoes
1 stalk celery, chopped
Directions
Mix the garlic, oil, thyme and pepper. Rub over top and sides of roast. (Will do this next time: Brown on all sides in a large skillet over high heat)
Place onions in slowcooker. Mix onion soup mix with beef stock and add to slowcooker. Place roast in the slowcooker and sprinkle remainder of ingredients around the roast.
Cover and cook on low setting for 8 to 10 hours or on high for 6 hours.
P.S. Sorry for the lack of pictures this week but couldn't seem to capture a picture before we all dug into the yummy meals...
Tuesday, March 3, 2009
Picture of the Week
After having lost my first DSLR camera at the airport on our way back from our Mexican vacation last year, I made a pact with myself when my hubby surprised me with another DSLR camera (Nikon D60) that I would learn how to use all of its features (aside from the Auto feature :)
It's been a year on my own with very little improvement and so I decided to take action out of my hands and enroll in a course... If that's not motivation to get out and do it I don't know what is...
Now I'm learning how to use my camera and taking LOTS of pictures. So I've decided to share them with you by posting them right here. In addition to the photo I'll also indicate details in case you want to replicate the photo with your own camera too.
Enjoy!
Title: My protogee
Setting: Aperature Priority
Lighting: Natural
ISO: 800
f5.3
Shutter Speed: 1/6
Saturday, February 28, 2009
I'm such a fan of Katie's Good Things Catered blog and I was so excited to try these recipes when I saw them on her blog... I just love mushrooms and poppyseeds yum!! (just not together of course...hehehe...) The tart has now become one of my hubby's favorite side dishes. The poppy seed loaf was very moist and although everyone loved it, I think I would use a little less butter next time and make them into the mini loaves as directed in the recipe.

Wild Mushroom, Caramelized Onion, Bacon and Herb Tart
Ingredients:
1/2 recipe pie dough
1 Tbsp unsalted butter
1 medium onion, sliced thinly
8 oz. wild mushrooms, sliced
1 Tbsp balsamic vinegar
6 strips cooked bacon
1 garlic clove
1/8 tsp salt
1/8 tsp ground pepper
1/2 tsp herbs de Provence
3 oz. Camembert, diced small
1 Tbsp beaten egg
Directions:
-In medium saucepan, over medium low heat, add butter to melt.
-When pan is heated and butter is melted, add onions and stir to combine.
-Cook onions down, stirring occasionally, until beginning to turn golden brown, about 15 minutes. -Preheat oven to 400 degrees and line baking sheet with parchment.
-Add mushrooms to onions and cook until browned but not burned, an additional 10 minutes.
-Add balsamic vinegar and stir to combine well.
-Add bacon, garlic, salt, pepper and herbs and cook, stirring, until fragrant, about 1-2 minutes.
-Remove from heat and set aside.
-Roll out dough to a rough 12" round.
-Place onion mixture in center of dough and spread out evenly, about 1.5" from the edges.
-Scatter Camembert around edges of onion mixture and fold dough edges into tart, pleating for presentation and leaving the center open.
-Brush edges of dough with beaten egg and place in oven to bake.
-Bake tart until edges are golden brown and tart is heated through, about 25-30 minutes.
-Remove from oven and let cool to just warm before cutting and serving.

Lemon Poppy Seed Mini Loaf
Ingredients:
2 cups all-purpose flour
2 teaspoons baking powder
½ teaspoon salt
1/2 c. unsalted butter, softened
1/2 c. shortening
2 c. granulated sugar
4 large eggs, room temp
2 c. buttermilk, room temp
1 tsp vanilla extract
juice of 1/2 lemon
zest of 2 large lemons
2 Tbsp poppy seeds
Directions:
-Preheat the oven to 350 degrees and prepare mini loaf pans (or 1 large loaf pan)
-In large bowl, combine flour, baking powder, salt, lemon zest, poppy seeds and whisk to combine; set aside.
-In medium bowl, combine buttermilk, vanilla, lemon juice, and whisk to combine; set aside.
-In bowl of stand mixer, add butter, shortening, and sugar and beat on high until light in color and fluffy, about 3 minutes.
-Reduce speed to medium and add eggs, one at a time, combining thoroughly before adding the next.
-Reduce speed to low and add flour mixture in three parts alternating with milk mixture, starting and ending with flour and mixing until incorporated.-Scrape batter into pans and spread evenly.
-Place in oven and bake until golden brown and toothpick inserted into center of loaf comes out clean, about 30 minutes (or 45-55 for a large loaf).
- Makes about 8 mini loaves
Enjoy!
Turkey and maple syrup...what a combination!
I know there are so many recipes out there for turkey but being a stickler for sticking to something that is tried and true, I've always had a hard time deviating from the recipe that I've always used. Although I was so glad to come across this recipe in an email I had received. I had never tried basting a turkey with maple syrup but being Canadian, I knew I had to try it... This recipe was a hit at our family gathering and perhaps our new family favorite...
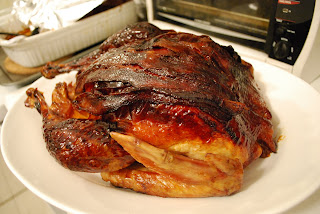
Maple-Roasted Turkey with Smoked Bacon and Stuffing
Cook Time: 4 hr 30 min
Ingredients:
4 tablespoon butter
1 large onion, finely chopped
½ chourico, diced
3 packages of stuffing (2 packages of seasoning)
1 large egg, lightly beaten
1/2 cup heavy cream
2 cups chicken stock
1 cup white wine
1 (12 to 14 pound) PC Real Butter basted turkey
1 cup pure maple syrup
1/4 cup hot water
8 strips smoked bacon
1/4 cup all-purpose flour
1/2 lemon, juiced
Directions:
Preheat the oven to 325 degrees F and remove the top rack.
In a saute pan, melt 4 tablespoons butter, add the onions and chourico, cook and stir for 15 minutes until soft and golden. Remove from heat. Put the cornbread in a large mixing bowl and scrape the sauteed onion mixture on top. Add the packages of seasoning, egg, heavy cream, and just enough chicken stock to moisten the stuffing without making it soggy (about 1/2 cup.) Toss well to combine.
Remove the neck and gizzards from the inside of the turkey and discard. Rinse the with cold water, pat dry. Sprinkle the cavity and skin liberally with salt and pepper. Fill the bird with the stuffing without packing too tightly; cook the remaining stuffing separately in a buttered baking dish. Truss the turkey; place it on a rack in a large roasting pan with remaining chicken stock and wine, and put into the oven.
Meanwhile, in a small mixing bowl, whisk together the maple syrup and hot water to thin the glaze out a bit; use this to baste the turkey every 30 minutes (starting at the 1 hour mark). The turkey should take about 4 ½ hours to cook. If the legs or breast brown too quickly, cover with foil.
About 2 hours into cooking, shingle the strips of bacon oven the turkey breast to cover; continue to roast and baste. The turkey is done when an instant-read thermometer inserted into the meatiest part of the thigh registers 170 degrees F (the thigh juices will also run clear when pricked with a knife.) Transfer the turkey to a cutting board and let rest for 20 minutes before carving, so the juices can settle back into the meat.
Skim off the excess fat from the pan drippings with a spoon and place the roasting pan over 2 burners set on medium-high heat. Using a wooden spoon, scrape up brown bits stuck to bottom of pan. Whisk the flour into the drippings, stirring as it thickens to prevent lumps. Add the remaining chicken stock and bring to a simmer; season with salt and pepper and hit it with a squeeze of lemon juice to brighten the flavor. Simmer for 5 minutes and then strain to remove any particles.
Enjoy!
Note: Please be careful as the turkey may look ready visually because of all of the sugar in the baste the skin darkens very quickly but that is not a direct reflection on whether the turkey is cooked on the inside. In this case, a thermometer reading is imperative!
Nutella Frosted Brownies
This brownies were quite the hit at my husband's birthday party. I don't remember where I found this recipe but we're lovers of Nutella so I knew I had to try it... The only change I made to the recipe was instead of swirling the Nutella with a toothpick, I placed batter into the muffin tin, added the spoonful of Nutella as is and then added more muffin batter on top... It was quite the chocolate-y suprise when you bit into the cupcake...

Nutella Frosted Cupcakes
Ingredients:
10 tbsp (140 grams) butter, softened
3/4 cup white sugar
3 eggs
1/2 tsp vanilla
1 3/4 cups (200 grams) sifted ap flour
1/4 tsp salt
2 tsp baking powder Nutella, approx. 1/3 cup
Directions:
Preheat oven to 325F. Line 12 muffin tins with paper liners.
Cream together butter and sugar until light, 2 minutes. Add in eggs one at a time, until fully incorporated. Don't worry if the batter doesn't look smooth. Add vanilla. Stir in flour, salt and baking powder until batter is uniform and no flour remains.
Using an ice cream scoop, fill each muffin liner with batter. They should be 3/4 full, if you're not using a scoop. Top each cake with 1 1/2 tsp Nutella. Swirl Nutella in with a toothpick, making sure to fold a bit of batter up over the nutella.
Bake for 20 minutes.
Remove to a wire rack to cool completely.
Makes 12
Enjoy!
I'm Back...
Okay I'm back and this time its for good...After a long hiatus, ending work, starting maternity leave, having a little baby, our new house being delayed again, family challenges along the way, its time to start getting this blog back up and running!
But we're going to do things a little differently this time around, I will promise the following:
1. To bake a recipe once a week
2. To make a filipino dish once a week
3. To make a portuguese dish once a week
4. To incorporate my latest hobby of photography by including a favorite pic in the blog, and
5. I'll include tips that I've found very helpful or touch on any recent projects that I'm working on and what my progress is with them...
and so this list will guide me along the way over the next couple of weeks and I'll revisit it later on and see if its working or not :)
In the meantime, let's get this party started...
Helena :)
Subscribe to:
Posts (Atom)